Tag Archives: sewing machine

2

ZIPPERPALOOZA

by

My friends Maria and Patrick of Adorn and Conquer are finally opening their own store in New Orleans! They are also carrying pieces by many artists and makers, including yours truly. The first merchandise order I shipped out was all zipper bags – 27 of them!

zipper bags, made by Julianne

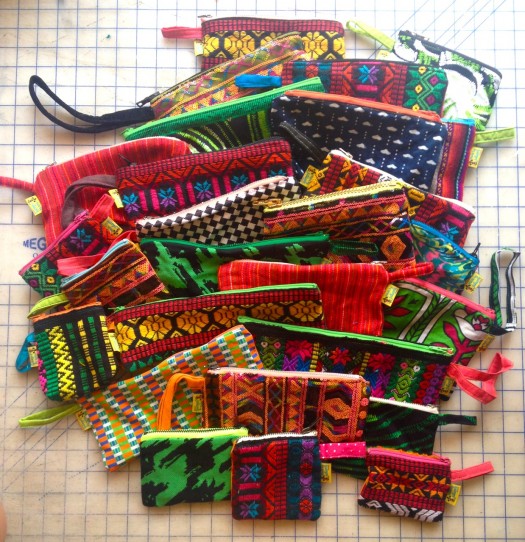
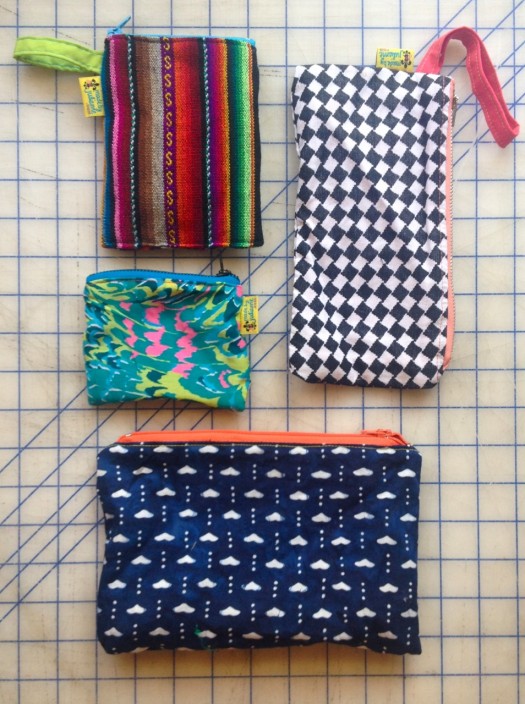
They are almost entirely scrap fabrics, lovingly saved for years. Every bag is lined, most have a loop for attaching a clip or wearing around the wrist.

zipper bags, made by Julianne

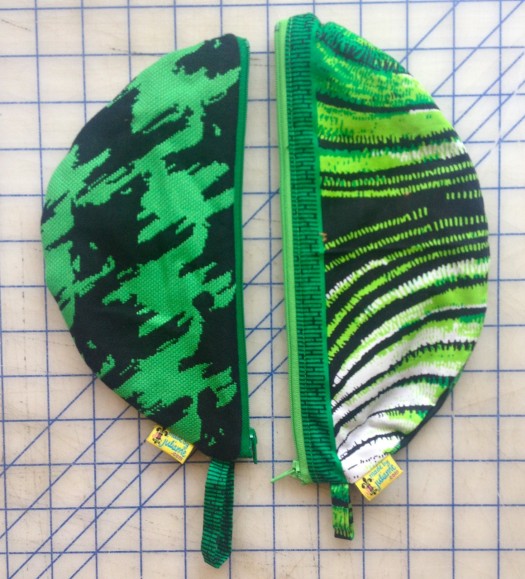
You know I’m usually about getting as many different colors onto one piece as possible, but I totally love these all-green bags. They each have both of the above fabrics (one on each side) and even the lining and zippers are green. I hope at least one of them gets used for some stylish stoner’s smoking kit.

zipper bags, made by Julianne

zipper bags, made by Julianne

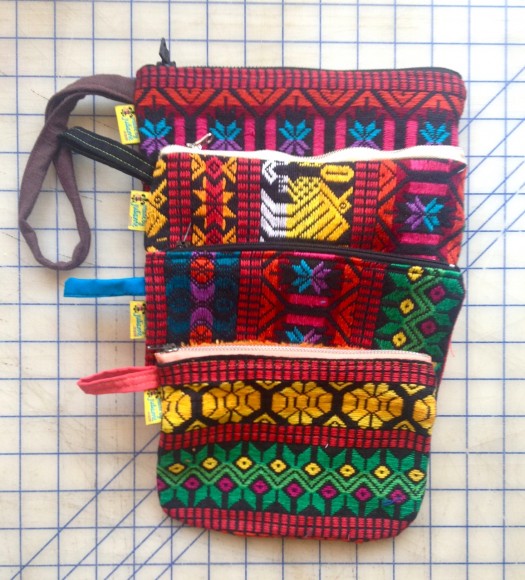
These embroidered fabrics were saved by my step-sister-in-law Ilaan (who also provided the fabric for my sofa, psychedelic bathrobe, and Miimii dress). They were such tiny scraps! These bags are backed with solid fabrics.

zipper bags, made by Julianne

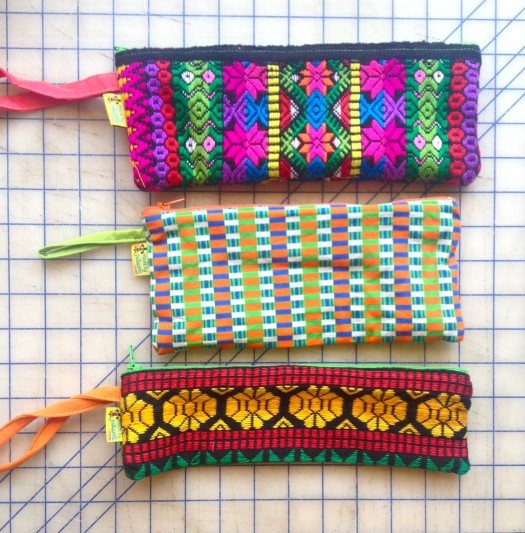
You’re never too old for a fabulous pencil case! zipper bags, made by Julianne

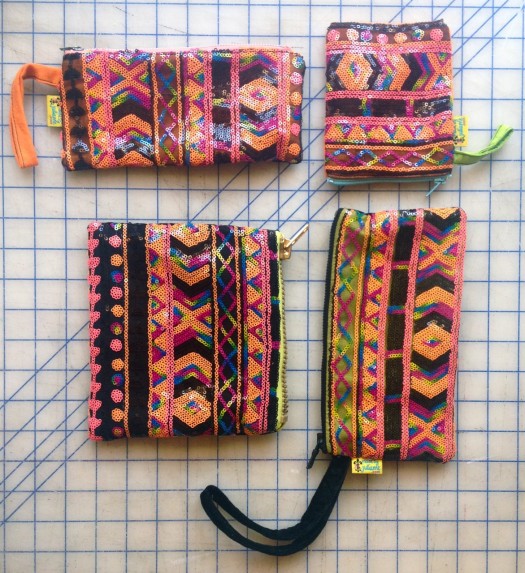
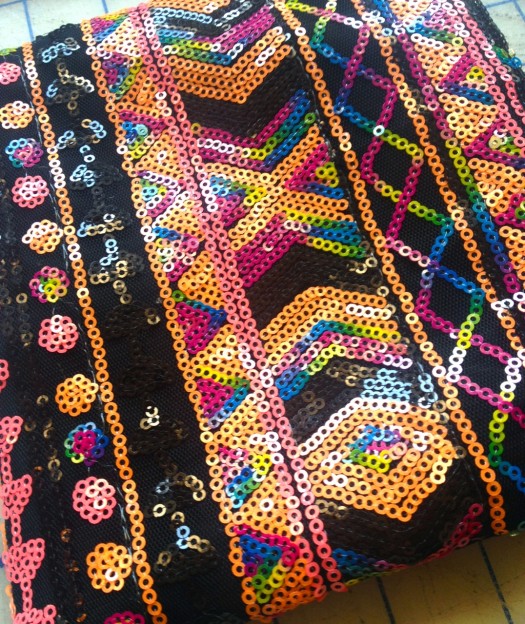
I totally gasped when I found this amazing blacklight sequin fabric. It’s just too perfect! I look forward to making a few fabulous pieces from this. Any suggestions?

zipper bags, made by Julianne

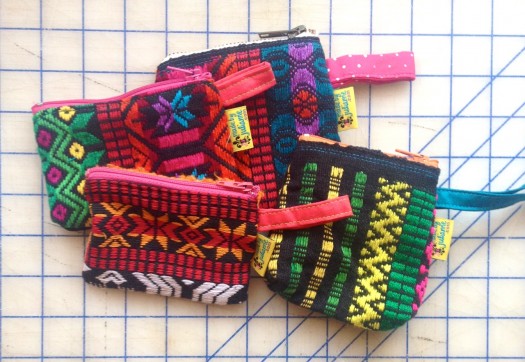
I made them in so many different shapes and sizes, which was dictated by the individual remnants. They’re each the perfect size for something! I envisioned the smaller bags as the perfect wrapping for a jewelry gift.

zipper bags, made by Julianne

Y’all know how I’m a sucker for projects that use up those wonderful little scraps. On one hand, I try to resist hanging on to “someday could be” materials. Sure, someday it could be used for whatever project I have in mind, but it’s more likely that stuff will just clutter up my life until eventually I get so frustrated that I just want it gone. On the other hand, I love using up every bit of possibility, and some fabrics are too special to let go, not matter how small the pieces are.

I’ll also have turbans and a special new shirt design in the store, but that’s for a special post. Congratulations to Adorn and Conquer on this exciting milestone!


6

REPLACE Pfaff pedal

by

Every once in a while I’d have an issue with my Pfaff 1222E. It usually happened when I was sewing curtains. Heavier fabric, long straight seams, pressing on the control pedal consistently for 10 foot hems. When I took my foot off the pedal the machine would keep sewing! Even more distressing, it would speed up like a little German devil. The only way to stop the madness was to hit the power button.

I’m not the only one who occasionally got a runaway sewing machine. It’s scary, and seemed like an expensive fix. The foot pedal and power outlet are on the same plug, and this part costs $80+ on Ebay! But my wiring was fine, it was just the pedal that was going nuts.

I tried to repair the pedal, but when I opened it up a tiny little resistor cracked and fell off. I confirmed with my electrical-genius friend that this was probably the problem, but we couldn’t really think of an easy way to fix this. The solution seemed to be replacement! (Another solution can be to clean lint out of the pedal, but that wasn’t my problem this time).

Inside the pedal

Inside the pedal

When you press on the pedal, this spring is what's moving.

When you press on the pedal, this spring is what’s moving.

There should be a tiny black bump on the left of the gold piece.

There should be a tiny black bump on the left of the gold piece…

I tried to find the same Pfaff pedal ($80+ online), or at least a white one, but in the end I bought a Singer from the 80s for $15 and just cut off the pedal. Stripped the wires on the Singer and Pfaff pedals, and spliced them together. It works great now! Brian has created a video documenting his process, but it really is as easy as that!

pfaff pedal

Next time we have the soldering iron out I’ll do a proper join of the wires with heat shrink, but for now the electrical tape is working super fine.

A perk of this is that I cut the Pfaff wire near the pedal, and the Singer wire near the plug, so the resulting spliced wire is really long! This means I can run both wires behind my table and still pull the pedal out as far as I want.

If you have any questions about this machine, check out the comments on my earlier post. You can read tips and feedback from people who have used this machine for decades, from people who know a lot more about it than I do, and people who have just acquired one of these machines. And it’s the #2 Google hit when you search the Pfaff 1222e – amazing!

10

THREADING THE PFAFF

by

I’ve really loved getting comments from other owners of the Pfaff 1222E. There’s nothing quite like “I’ve had this machine for 30 years and it’s never let me down” to really make you appreciate a well-built tool. If you’re interested in learning more about this machine, check out my other posts on the Pfaff 1222e: my initial review, and an update on the machine with tips on finding feet and extensive comments!

If you’re having problems using industrial cone threads or home-sewing spools on your vintage sewing machine, I have a bit of advice on threading and tension techniques.

threading Pfaff 1222e, made by Julianne

When the machine was new-to-me and I was using spools on it, often the thread would get caught on the rod that the spool spun on. From a long-forgotten website I got the advice to set my spool on the right rod, and to create an additional thread guide by putting a cut straw on the left rod. I cut a groove to hold the thread and melted the edge with a lighter to lessen the friction.

I use this technique with every single spool. and it definitely helps the thread flow through the machine.

threading Pfaff 1222e, made by Julianne

For those unfamiliar, cone threads hold 1,500+ yards of thread, whereas spools hold 250-500 yd. Since sergers use so much thread, it is much cheaper to use cones on that machine, and it’s simpler for me to have mostly cones instead of matching spools. In LA it’s easy to find inexpensive cone thread. You can even get factory overstock: for $1 you’re getting at least 500 yd and sometimes even 3000. The selection is a grab-bag, but I always check to see if any of my most common colors are in the bins (all but 4 of the above cones were purchased for $1 or less).

I prefer to use cone threads for my home sewing machine, but they present a challenge with threading. Where does the cone go so that the thread doesn’t get snagged? There are stands for cone threads available, and they work fine, but I already have enough stuff on my sewing table.

threading Pfaff 1222e, made by Julianne

threading Pfaff 1222e, made by Julianne

I have a handy shelf above my table, and all I did was screw a hook into the underside. The cone sits on my table (and gets knocked around sometimes, but it doesn’t matter). The thread feeds up into the hook, and then into my machine at the same angle as a smaller spool would.

threading Pfaff 1222e, made by Julianne

threading Pfaff 1222e, made by Julianne

Because the cone doesn’t spin, the top thread often doesn’t have the same tension as if I were using a smaller spool. Instead of dialing my tension knob up to 10, I just loop the thread around the bobbin guide and I’m good to go!

threading Pfaff 1222e, made by Julianne

At a recent sewing meet-up, Sandra adjusted the tension of my bobbin. She says that you should be able to hold the thread tail and hang the bobbin without it rolling out.

Different threads have different tension requirements, and your fabric and needle type can also effect the quality of your stitches. All these variables can be overwhelming when you’re learning to sew, but over time they become second-nature. Happy sewing!

1 2