Categotry Archives: instructions

13

A BURNING MAN WEDDING

by

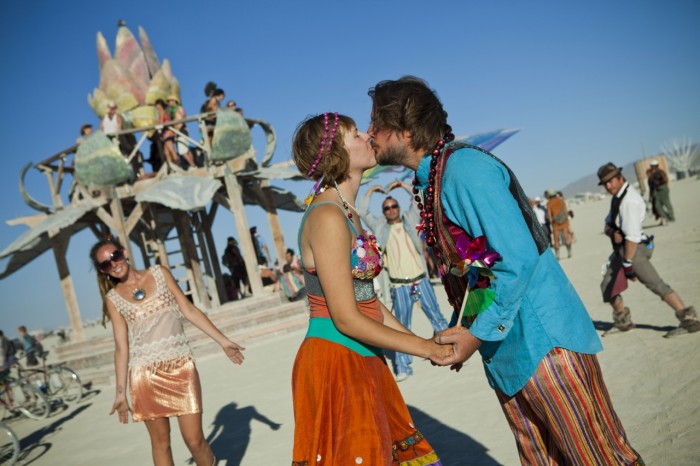
rainbow Burning Man wedding, Made by Julianne, photo by Alex Finsethphoto by Blake Gardner

Jason and I met at Burning Man 2009, he proposed there on September 1st in 2011, so the obvious place to have our wedding was Burning Man 2012 on September 1st, which happened to be burn day. The internet has more wedding-planning blogs than it can handle, but there’s not much devoted to planning a wedding on the playa. Basically, I’m writing this so that the top search results aren’t making fun of receptions where some of the guests are nude. [Contrary to my expectations, there wasn’t anyone naked at my wedding! There were some topless people though, and I was mildly disappointed that only one guy was shirt-cocking.]

My target audience is people who have actually been to Burning Man. You know what it’s like out there, how much water to bring, and that jazz. How the fuck do you get married there?  It’s an easy pain in the ass.

THE TECHNICALITIES:

Burning Man has a tiny page dedicated to wedding information, but it’s pretty incomplete, so you’ll definitely need to email BM weddings for up-to-date requirements. Be forewarned that Pershing County wants your officiant’s registration information no later than 1 August, so get this ball rolling sometime in July. They will need to include an affidavit of good standing from the ordaining organization. If you don’t have a friend to officiate, there are volunteer officiants on the playa and you should contact Armadillo at BMorg to make arrangements.

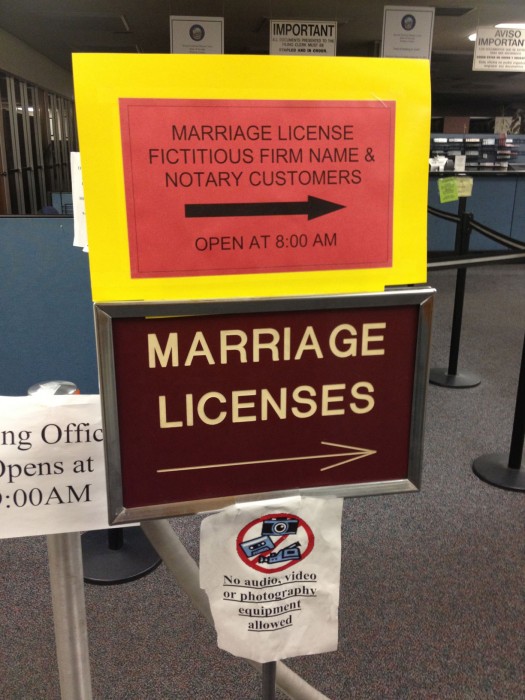
how to get married at Burning Man, made by Julianne marriage license

You will need to pick up your Marriage License from any court in Nevada; the courthouse in Reno is open till midnight and convenient to get to. You need ID, $60 cash, and also you’re both supposed to know the cities and states where your parents were born (I had to guess for mine). After the ceremony, have the officiant and two witnesses sign the Marriage Certificate, and then mail it back to the courts within 10 days. The court will give you all these instructions too. READ THEM. Also, don’t lose the packet on the playa!

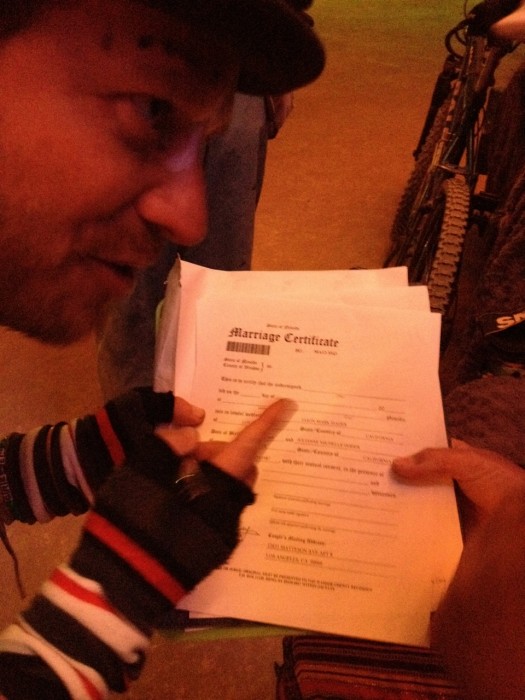
rainbow Burning Man wedding, signing the marriage certificate on the art car

We signed our certificate on our art car while the Man burned, ’cause we’re that fucking awesome.

THE ARRANGEMENTS:

For me, the greatest thing about having a wedding at Burning Man is that it doesn’t need much planning. Most wedding traditions simply aren’t possible out there, so that’s a lot less to worry about. No seating chart, no catering, no flowers or favors or any trappings that we don’t absolutely want and are willing to transport out to the desert. Our location gave us the chance to consider what we want our ceremony to be, allowed us to focus on the meaning rather than the material, and kept us from getting self-centered. It’s not just our special day, it’s fucking Burn Day on the playa, and it kept me humble.

Burning Man can be pretty expensive. But it’s cheaper than a traditional wedding. Our wedding didn’t really add anything to our normal Burning Man budget, except maybe a case of champagne at Costco. That being said, it gave us license to splurge a little on some luxuries. I loved justifying little purchases as “it’s for my wedding!” On a side note, it’s generally just awesome to be about to get married and to tell strangers about it. It makes everyone happy (and you can use it to your advantage, as in when you need your sewing machine repaired ASAP to finish the wedding dress). Share your impending joy!

In the spirit of “leave no trace” and “that’s not really us” we made a website invitation that was emailed to our nearest and dearest.

THE GUEST LIST:

There were many people that couldn’t make it—and there’s the cosmic rub with a playa wedding—but there were many surprising people that did.  Among Jason’s grade school friends (a friend he knew since kindergarten happened to be camping down the street from us!) Jason’s brother Jeff made it to the burn just long enough to see us get married, and I had a bridal crew in camp that took care of me.

Of course I would have loved to share my favorite time with some more of my favorite people, but I don’t regret anyone not being there. And there’s no guilt about inviting certain people, or frustration if they actually show up.

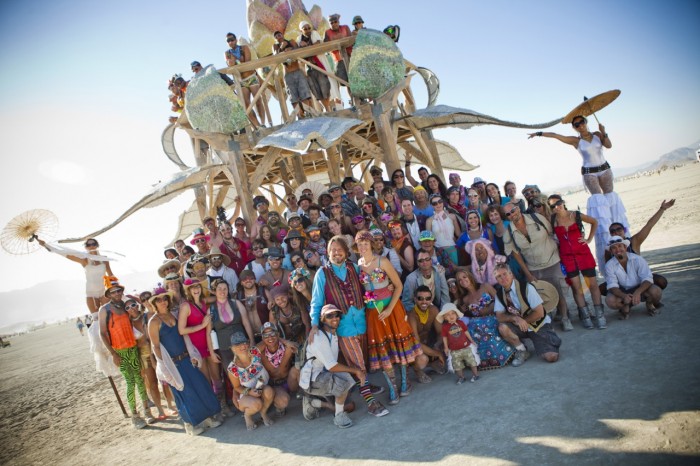
rainbow Burning Man wedding, Made by Julianne, Photos by Blake Gardner

photo by Blake Gardner

But back to those friends who did come: they are adventurous enough to even consider journeying out to the playa. I like to think that our wedding is an opportunity for them to discover new parts of the world and new parts of themselves.

And then there are the campmates: I’ve only known these people for a few years, but they truly are my Post Nuclear Family. In fact, we only met Mary and Eric 8 days before the wedding, and Eric signed as witness on our marriage certificate! In true playa-magic fashion, we were serenaded by a friend-of-a-friend who had attended the wedding. All week long, we were surrounded by friends who were excited, supportive, and super helpful. They are always that wonderful, but I felt like it was more intense as the wedding got closer. Old and new friends, they have been with us through some magical moments, and I couldn’t imagine getting married without them.

THE LOCATION:

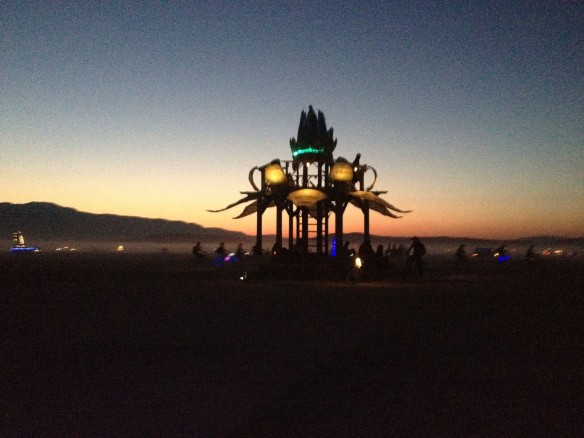
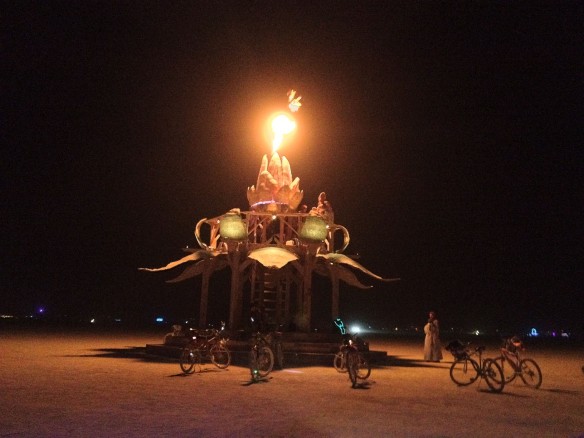
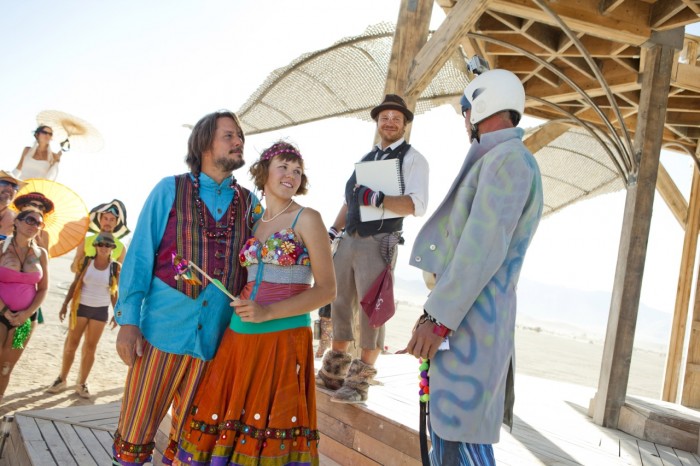
A lot of couples choose the Temple as their location, and while it’s always filled with love and beauty, the Temple doesn’t speak to our us-ness. Instead, we held our ceremony at the Bottlecap Gazebo / Lotus Pavilion, which we picked once we arrived on the playa. It’s a good idea to check with the artist before inviting 100 people to show up (mostly to make sure that the art won’t have been burned before your ceremony!).

Even though it was perfect, we kept our eyes open for another location, just in case there was a place that was perfecter.  But the Lotus Pavilion kept coming back to us at all times of day.

And dusk.

Bottlecap Gazebo, Burning Man 2012, made by Julianne

And night.

Bottlecap Gazebo, Burning Man 2012, made by Julianne

We were lucky to find the pavilion along the spoke that led to our camp, so it was easy to get to.

TRANSPORTATION:

We had all guests meet at our camp (conveniently most of them were camping with us). Jason made sure to register our camp and ourselves with playa info near center camp, and we coordinated our marriage to be at the same time as our radial camp location: 4:45pm.  (We camped at 4:45 and “E”).  That way when we saw people along the day, we could tell them “4:45pm on Saturday.  Meet us at 4:45pm and E.”  Not everyone will get this lucky, but if you plan for luck it seems to happen.

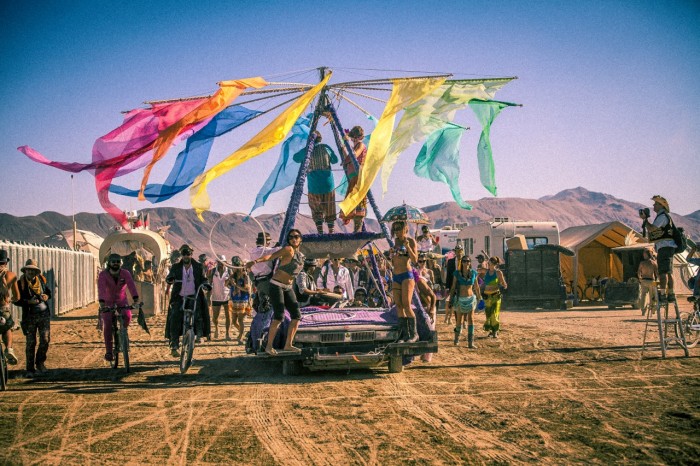
rainbow Burning Man wedding, Made by Julianne, Photos by Aleck Gandel

photo by Aleck Gandel

In true Burning Man / New Orleans fashion, we paraded to our wedding site. Our camp happened to be filled with musicians, stilt walkers, yogis and yoginis, and wonderfully strange mutants so our parade was awesome.  Best Man Cosmo drove the Sensatron with Rev Shawn T-Bone Taylor riding shotgun. A trio of drummers played on the back, while Jason and I rode alone up top. We were surrounded by a procession of our entire camp and many new friends on foot and bike. Some straggler strangers joined in, but for the most part our parade was comprised of old and new friends, and all loved ones filled with lovey love-love love love.  Love.

A couple friends rode up ahead of us to prepare the Gazebo before our arrival, so that there was a space for us to stand and everyone already hanging out there knew what to expect.

THE CLOTHING:
I’ve written separate posts on my “wedding dress” and Jason’s awesome alternative to a tuxedo. There are couples who adapt traditions to suit themselves and the playa, but more important than wearing the “right thing” is to wear what’s right for you (just like wearing any outfit at Burning Man). This is one of the most radical opportunities for radical self-expression!

Another benefit to a wedding on the playa is that everyone isn’t dressed up in the same drab fabric.  We told our friends to wear their favorite color and we all made a brilliant rainbow.

rainbow Burning Man wedding, Made by Julianne, Photos by Blake Gardner

photo by Blake Gardner

After Burning Man, we held two receptions to celebrate with our entire crew of burners and non-burners. One was held in Los Angeles a few weeks after the wedding, and then we drove to New Orleans to celebrate with more friends and family who weren’t able to travel cross country. Because we’d already been married for weeks, there was little pressure on the receptions, so Jason and I were able to relax and enjoy the parties. This is a great opportunity for burner couples to follow any traditions that maybe didn’t make it out to the playa, like caterers and wedding bands.

Because we were responsible for making our wedding, and responsible for whatever we want to happen on the playa, we only made what we wanted to happen. A wedding at Burning Man can be liberating, exciting, and mostly stress-free.

If anyone has questions about our wedding or advice about your own Burning Man wedding, go ahead and email me and I’ll try my best to help. If you’d like to see more of our wedding, you can watch Jason’s awesome movie about it.

Maria Mango – Oh My! from Jason Siadek on Vimeo.

Psychic (Black Rock) City – Yacht from Jason Siadek on Vimeo.
16

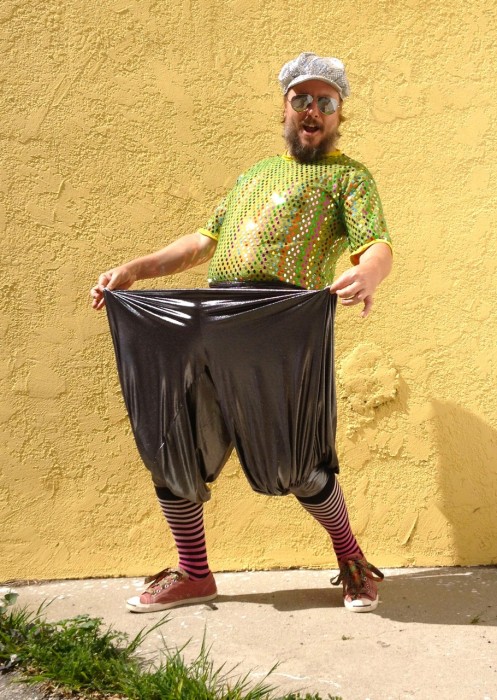
TUTORIAL: GENIE PANTS

by

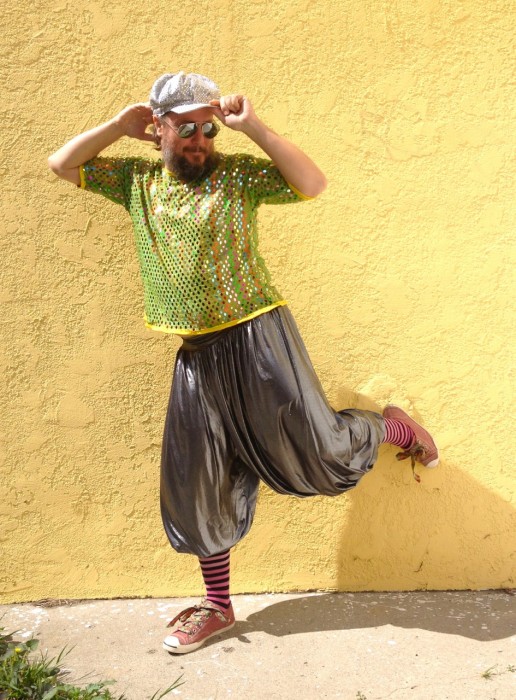
By very popular request, I’ve made a tutorial for the genie pants. This is a very long post, with lots of pictures! If there’s anything that doesn’t make sense, please let me know in the comments field at the end.

DIY genie pants, made by Julianne

Click on the link to see the instructions:

Continue reading →

Some people call them harem pants, but I prefer genie pants, cause I’d rather be a genie and make magic than be in a harem. Sure, you could say that both reference confinement, servitude, and giving pleasure, in which case I would call them balloon pants. BUT WHATEVER.

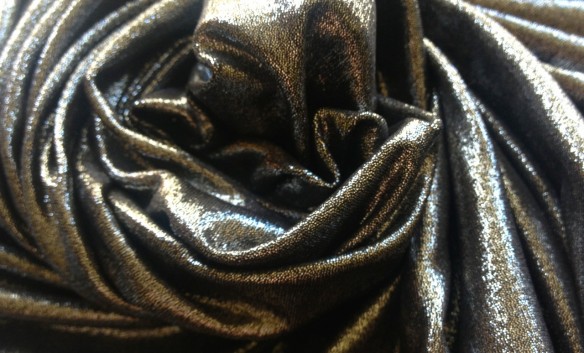
For this example I am using a very stretchy lycra, but you could also use a woven fabric for the legs. I love the wide stretchy waist and leg bands, but you could use elastic on a woven fabric, or have this waistband fitted with a zipper like a pencil skirt.

Since this design has so much fullness, and my fabric is so stretchy, nothing has to be exact. I came up with this technique myself, and I’d love to hear any alternative methods.

how to make genie pants, made by Julianne

I’m making this pair of pants for my husband, so use your own measurements!

You can either cut these pants on the grain or cross grain, depending on the stretch of your fabric and layout of the print. Since they are so voluminous and stretchy, I don’t worry about seam allowances.

how to make genie pants, Made by Julianne

STEP 1: CUTTING

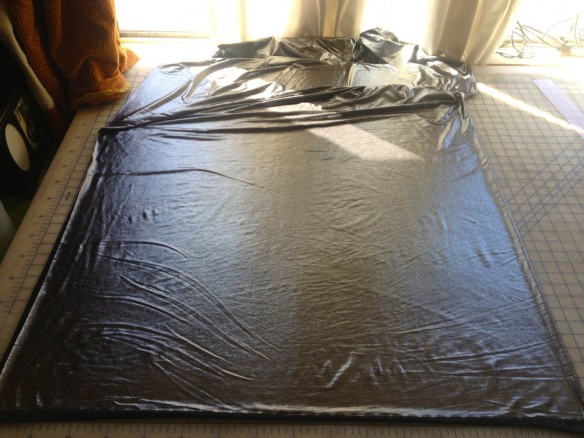
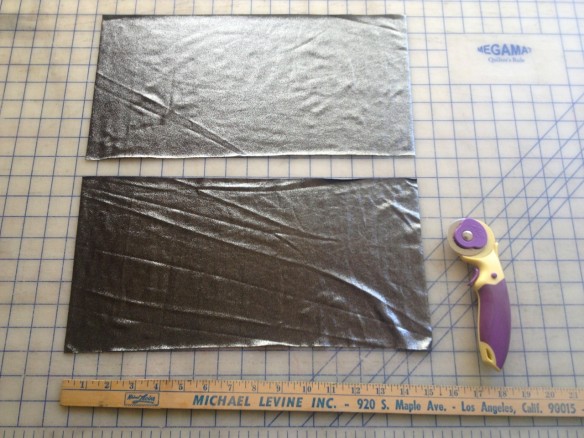
These pants are made in 5 pieces: a left and right side, a waistband, and two leg bands. You need approximately 2.5 yards of fabric total (2 yd for the legs, 1/2 yd for the bands).

First, I cut the length of the pants, about 30″. You’ll need two pieces this length, one for each side (I take one 60″ piece and fold it in half. This cut should parallel to the finished edge of the fabric, and perpendicular to where it was cut off the bolt). With the waist and leg bands, the pants can be worn down to the ankle or bunched up on the calf. Like every other measurement, adjust this as you see fit.

For a very balloon fit, I like to have the pants about twice as wide as the hips (2:1). So each side piece is cut as wide as the circumference of the hips. If you don’t want your pants to be as gathered, or don’t have enough fabric, you could reduce this ratio to 1.5:1. My husband’s waist is about 40″, so I am cutting the pants to be about 80″ in the waist.

how to make genie pants, made by Julianne

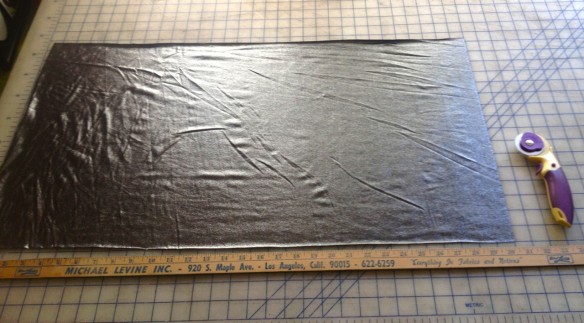
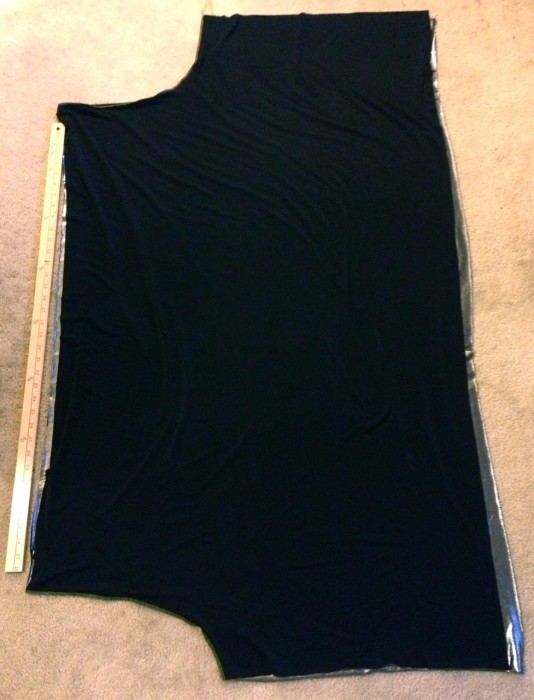
In my case, each piece for the legs is 30″ long, and 72″ wide, with the stretch and selvedge across the 72″ side. Once I cut out the crotches, the top of the pants will be about 40-50″ wide.

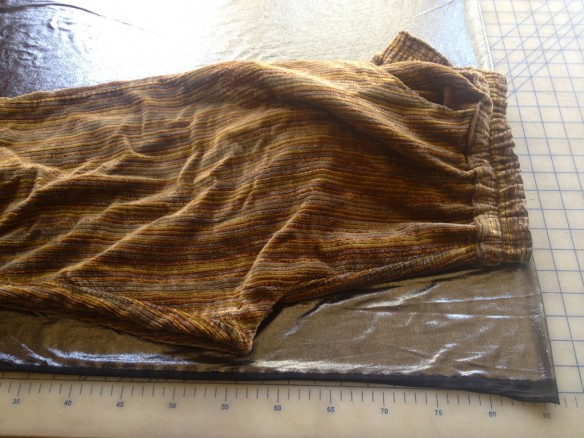
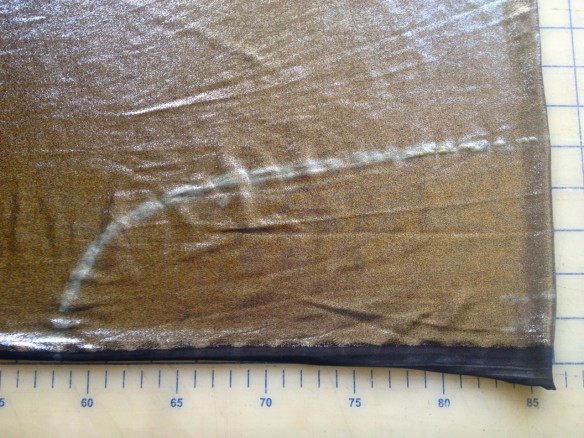
The next step is to cut the crotch scoop. I do the front first, and base it off pants he already owns. Since these genie pants are loose and breezy, I cut the crotch lower and wider than his trousers fit.

how to make genie pants, Made by Julianne

Regular trousers laid out on the fabric to trace the scoop of the crotch

how to make genie pants, Made by Julianne

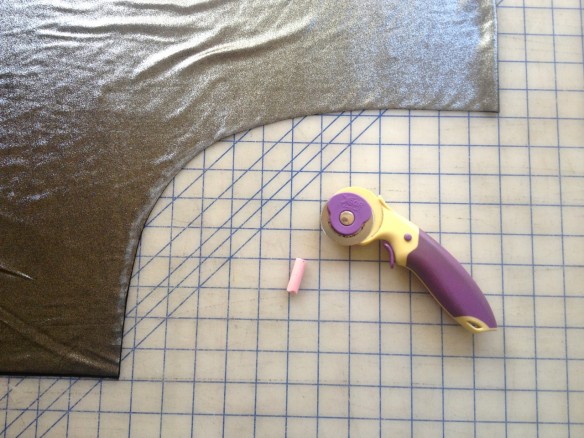
Crotch scoop, traced from trousers

how to make genie pants, Made by Julianne

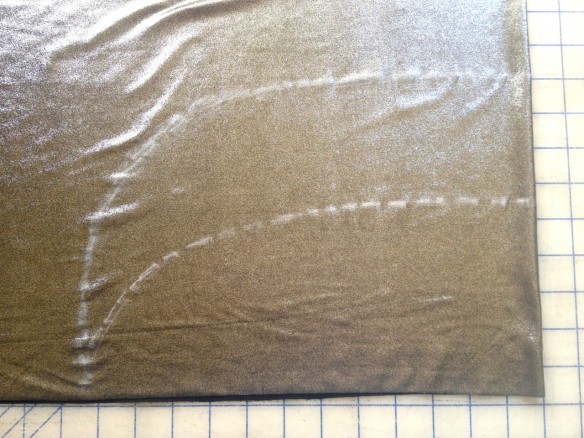
Wider and deeper scoop, shown by the light pink line

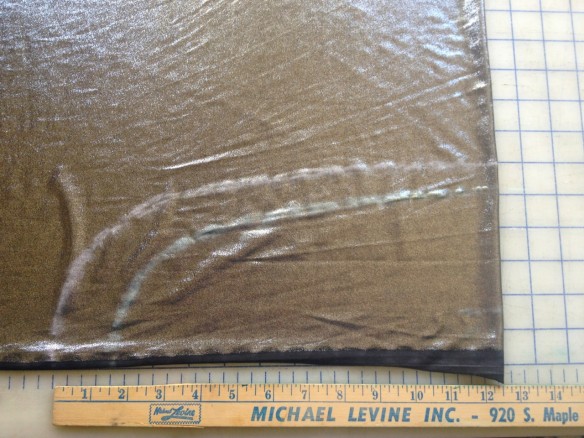
My husband’s hips are approximately 40″, so the waist of each side piece is 40″ for a total width of 80″. Basically, I’m using the entire width of the fabric, in my case 60″. Moving to the opposite selvedge, I cut the back with the same length but a wider scoop (about 3″ deeper) to accommodate the booty. Again, not rocket science.

how to make genie pants, made by Julianne

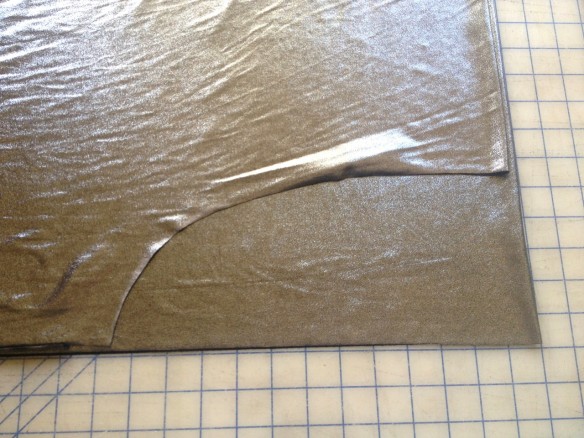
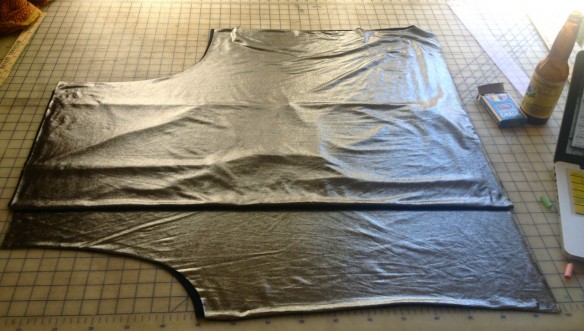
Crotch scoop, with the back on top

Here’s a nice shot to show the crotch. The front piece is on bottom, with a “shallower” crotch scoop. The back piece, on top, is cut deeper, to accommodate dat booty as well as sitting without too much wedgie action.

Regular trousers laid out on the fabric to trace the scoop of the crotch

The shallower front crotch is used as a guideline for the back scoop. I laid the front piece on top of the back and then traced that curve.

how to make genie pants, Made by Julianne

The front crotch is traced in pink, and then I drew the line for the deeper back scoop in blue chalk. Notice that it’s only wider, not lower.

how to make genie pants, Made by Julianne

Wider back scoop

how to make genie pants, made by Julianne

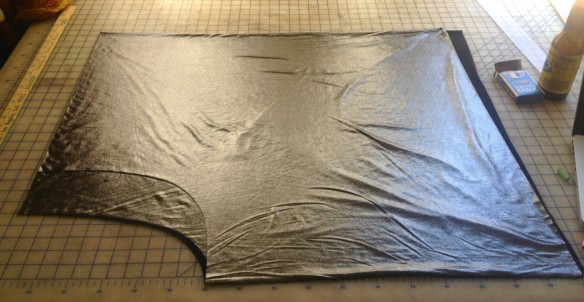
Here’s the whole piece, with 24″ in the center folded (because otherwise it’s too big to photograph on my cutting table.)

Since the fabric has so much stretch and will be holding up a lot of fabric in the pants, I make the waistband about 20% smaller than the actual waist. The length depends entirely on you, but cut it high enough that it can be doubled. In my case, the waistband is 30″ wide and 16″ high (which will be folded down to 8″ on the finished pants)

how to make genie pants, Made by Julianne

Waistband, 30 x 16″

how to make genie pants, Made by Julianne

Leg bands, 15 x 8″

The leg bands are just smaller versions of the waistband. Mine are 8″ high (to be doubled over to 4″) and 15″ wide.

You should have two leg bands (15 x 8″), one waistband (30 x 16″) and two leg pieces, one for the left and one for the right.

STEP 2: SEWING

how to make genie pants, Made by Julianne

how to make genie pants, Made by Julianne

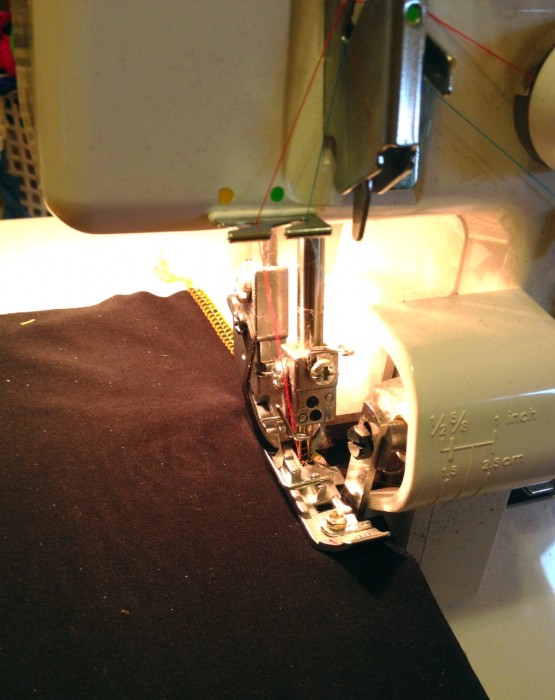
Now to the sewing! I sew the seams on my serger, and use my regular machine for the gathering stitches. If you don’t have a serger, use a zigzag or 3-step zigzag to give your seams enough thread to stretch.

I’m illustrating these steps using the smaller leg bands, but the process is the same for the waistband as well.

how to make genie pants, Made by Julianne

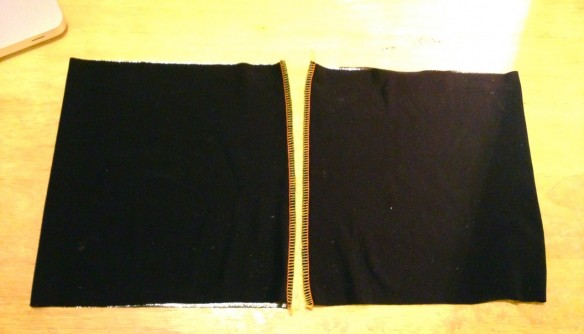
A: The two leg bands, side by side

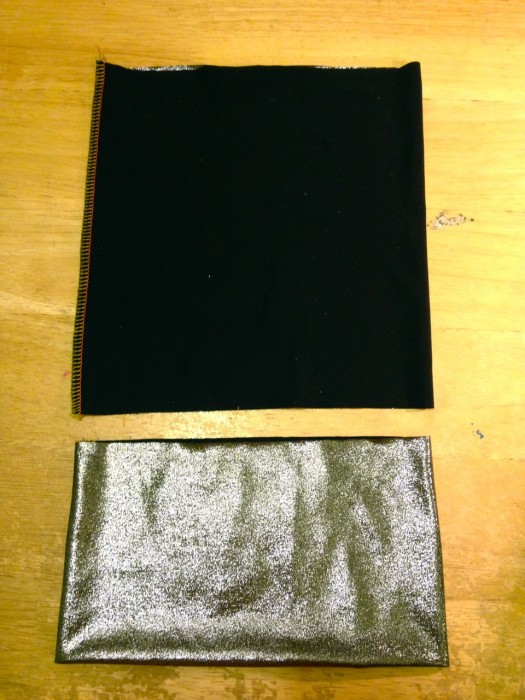
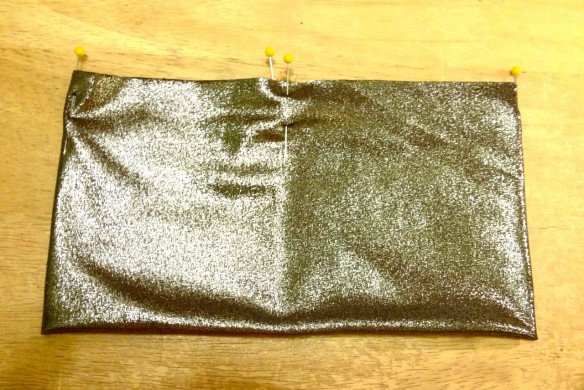
Sew the waist and leg bands each into a tube. Take this opportunity to test that the pieces are the right size for your body. You want the waistband to be tight enough to hold up the pants securely, but comfortable for lounging and getting bloated from all the beer and crackers. Likewise for the leg bands, but maybe your calves don’t get bloated so just make sure that they fit your leg snugly. Fold the bands over, wrong sides together, and pin the raw edges. I like to place my pins in quarters (dividing the entire circumference into 4 segments) to help with the gathering later.

how to make genie pants, Made by Julianne

 Top: leg band from step A. Bottom: the leg band has been folded with its wrong sides together to that the raw edges meet. The seam is vertical, along the short edge.

how to make genie pants, Made by Julianne

The leg band is pinned with raw edges together, right side out, and the raw edges are marked into quarters with pins.

Set the leg and waist bands to the side for now.

how to make genie pants, Made by Julianne

how to make genie pants, Made by Julianne

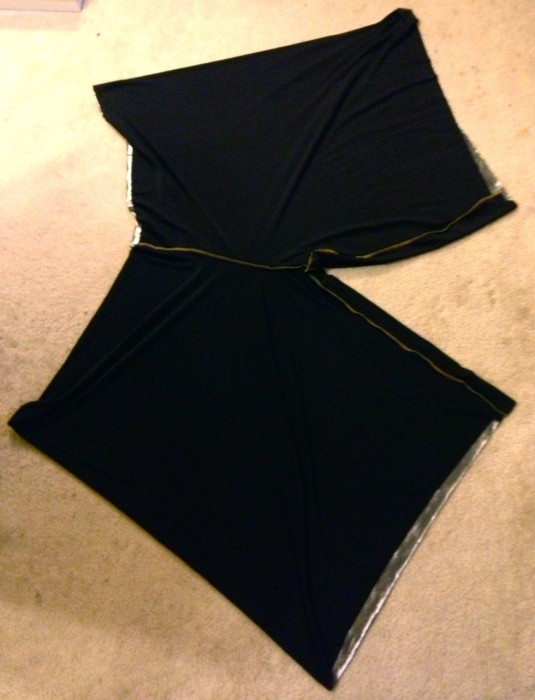
Then I sew the front crotches together, then the back center seam, and then the inseam as one long seam.

how to make genie pants, Made by Julianne

Crotch and inseams sewn together, and now they are starting to resemble pants!

Mark the top and legs of the pants with pins (dividing the circumference by 4).

how to make genie pants, Made by Julianne

Gathering the fabric at the top and bottom of the pants

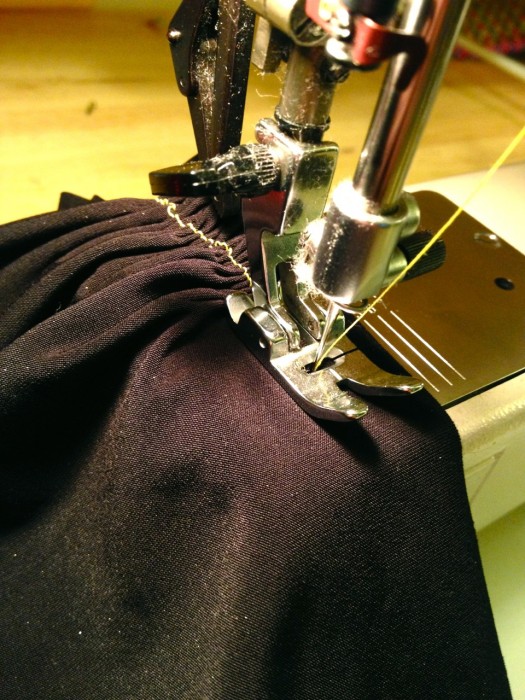
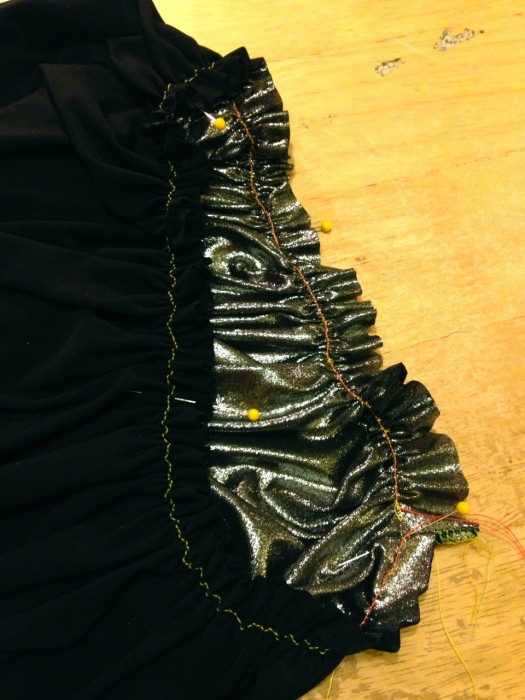
Next comes gathering! I’ve done this step in so many different ways, but I feel that simply sewing a long seam with low top-thread tension is the easiest. I like to use different color threads for the top spool and bobbin. I don’t have a ruffle foot because I don’t do a lot of gathering, and this works for me. Usually this tension gathers the fabric right behind the foot automatically. And so: sew the top of the pants and the bottom of each leg.

how to make genie pants, Made by Julianne

Gathered pant leg, with pins dividing the opening into quarters

Pull the thread to gather the fabric so that it’s about the size of your waist and leg bands.

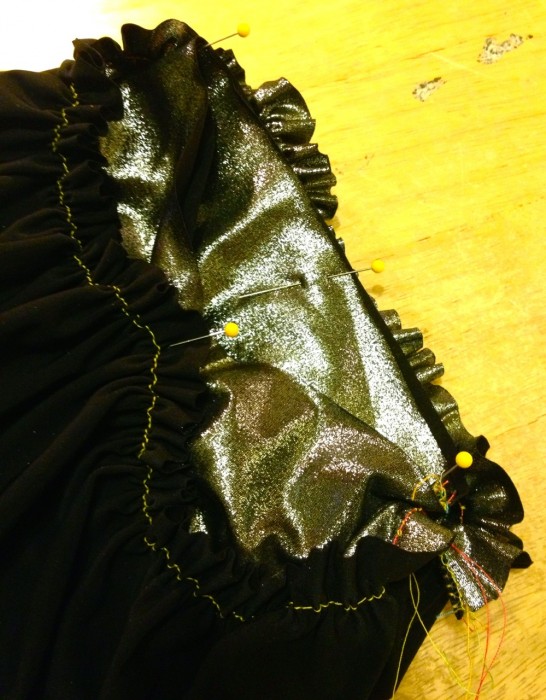
Pin the leg bands onto the bottom of the legs, right sides together, aligning the band seams with the inseam and the other pins. Repeat for the waistband.

how to make genie pants, Made by Julianne

The leg band is pinned to the gathered pant opening, with the quarter-pins lined up.

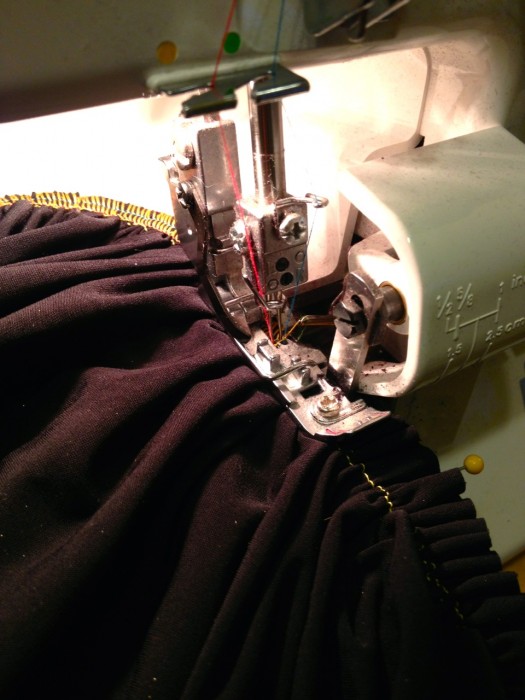
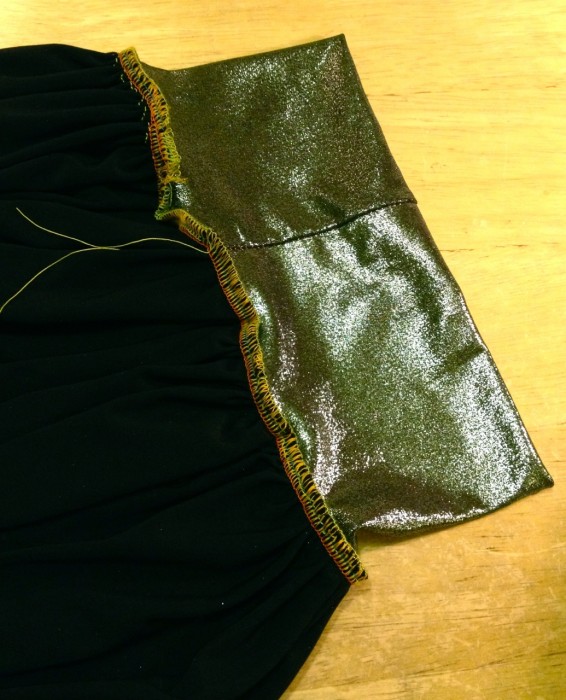
Sew the gathered pant opening onto the leg bands. Your seam should be along the gathering line. Once you stretch this seam, the gathering straight-stitch will pop, as it should.

how to make genie pants, Made by Julianne

Serging the gathered pant leg (top) onto the leg band. The pin is about to be pulled out before going under the knife.

how to make genie pants, Made by Julianne

how to make genie pants, Made by Julianne

Repeat for the other leg band, as well as the waistband.

AND YOU’RE FINISHED.

DIY genie pants, made by Julianne

I don’t add pockets in my stretchy pants because the weight inside them would pull the fabric in all kinds of crazy ways. I have done it with woven pants, and here’s how: Cut the legs as four pieces (right front, right back, left front, left back) and then just sew a pocket into the seam. You could also sew the top of that pocket into the waistband seam, for added stability.

If you’re interested, you can see more photos of the finished pants.

1 2 3 4 5